How to bulk add stickers to Goodnotes
Step 1:
Open your digital stickers and locate the folder with all the pre-cropped PNGs.
Note: This depends on the sticker book you purchased. ChartingDreams sticker books all come with an additional folder with the PNGs saved.

Step 2:
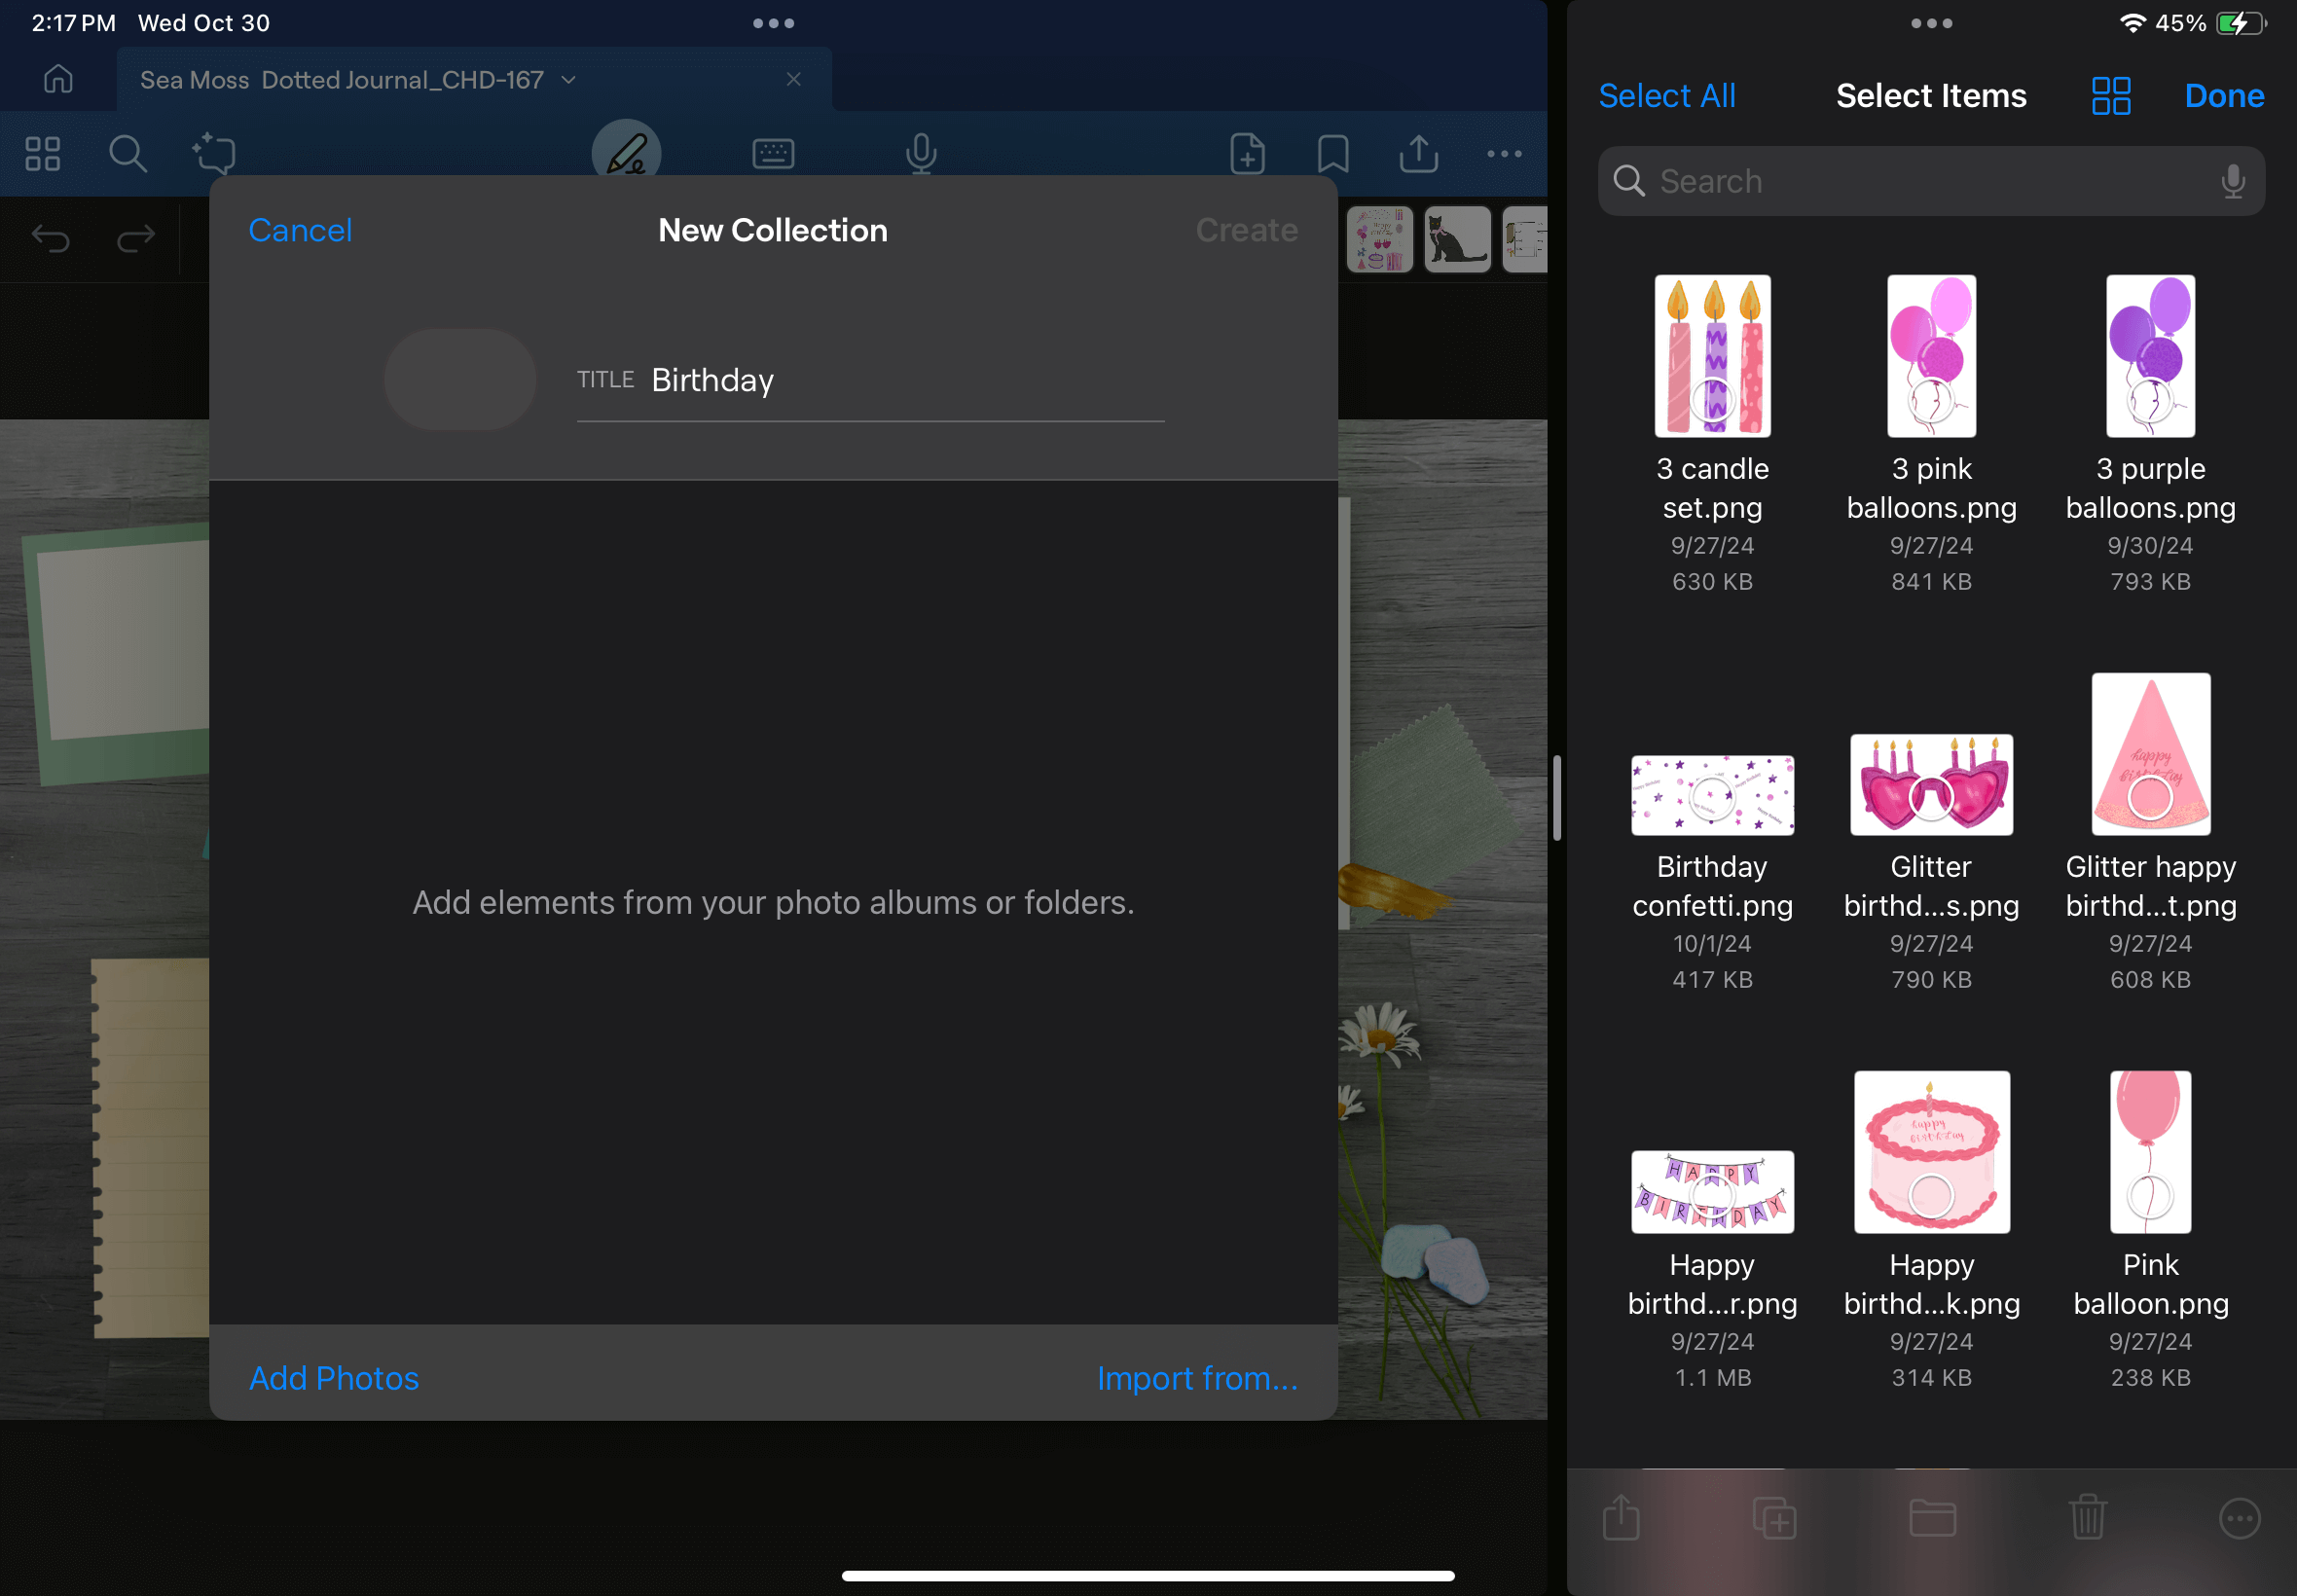
In split screen on your iPad open the PNG folder and your planner in Goodnotes

Step 3:
Click on the star in the Goodnotes tool bar to access the elements. Once you select the elements button a window will pop up. Click the plus (+) button at the bottom of this windows tool bar to create a new collection.

Step 4:
A new window labeled, “New Collection” will pop up where you can label your collection. In this instance I was importing Birthday stickers so I named my collected “Birthday”.
Step 5:
Now in your PNG folder click the 3 dots in the top right corner > Select> Select All

Step 6:
Once all PNGs are selected the PNGs will have a blue check mark. Next in one fluid motion with your apple pencil you’ll click and drag the selected PNGs over to your New Collection. If done correctly, they’ll appear in the New Collection window.

Step 7:
Once all the stickers are added to your New Collection click the create button at the top.
Then check your elements to be sure that your new sticker collection was correctly added.
Enjoy your new collection!